Sure, it’s fun to make lights blink.
Even more fun to use an input to control what your Arduino can do.
Follow along below and turn in your finished program on Canvas.
- BEFORE YOU OPEN your program: make a copy of your multiple LED program in Tinkercad.
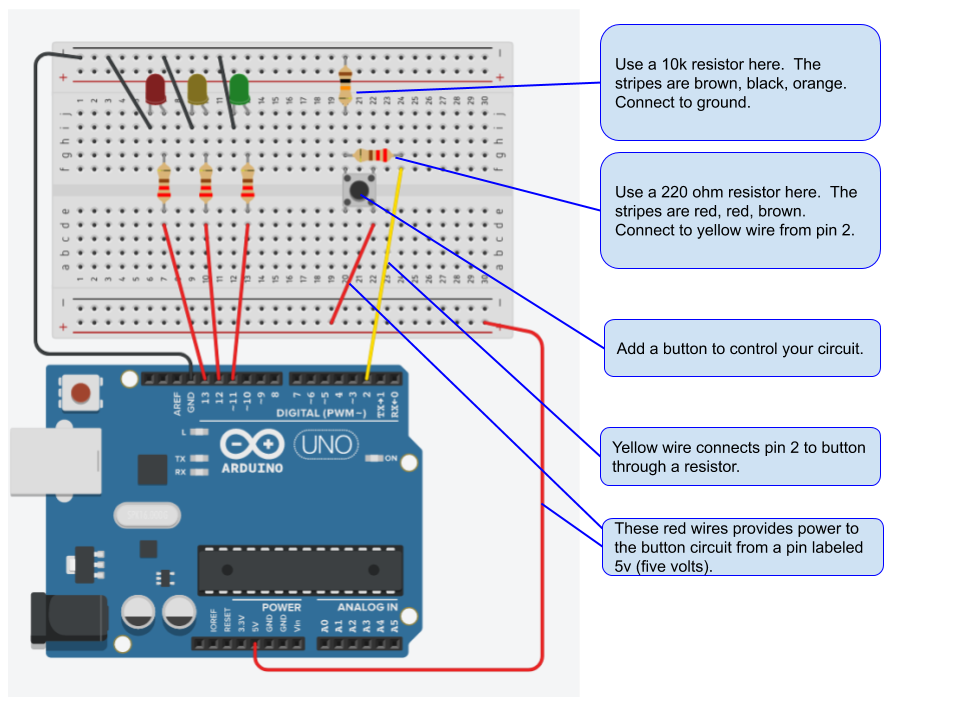
- Use the diagram below to add a button to your circuit. Pay close attention to the types of resistors that are used (look at the colored stripes).
- after you add the button, use the other diagram below to modify your program so that it works with the button.
- when you are done, please follow these instructions to share your Tinkercad program on Canvas.
Color code:
red wires- leading from pins to breadboard
black wires- ground
green wires- button
yellow wires – input from pin 2
And now add the code:
